I've been loving all the herringbone quilts I've seen all over pinterest so naturally I had to learn how to make my own.
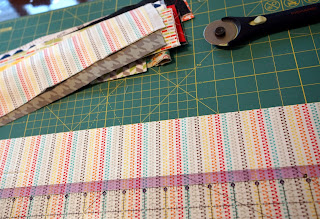
I used fat quarters for this. Iron, and starch your fabric fold it half (I folded mine in half so that it was a little over 18 inches wide) and cut it into 3 inch wide strips. Since your fabric is folded in half you will be cutting 2-3 inch wide strips at a time (keeping the wrong sides of your fabric together).
Then cut your strips into 6 inch wide pieces. You will be cutting 2-3x6 inch pieces at a time. IMPORTANT: Make sure you keep the 3x6 inch pieces together (they will be wrong sides together). If you don't keep your fabric together you will only have half a herringbone when you cut your fabric at an angle.
Now you're ready to cut. My mat has these nice angles which made it easy. I cut these on the 30 degree angle. Cut both sides the SAME direction, or you will end up with trapezoid.
After you your fabric is cut you should see the pattern coming together.
Lay your pieces in the order you want to sew them.
Sewing them together is a little tricky. Fold the top piece onto the bottom, you will have a little overhang. You should be able to see the corner of your bottom fabric. I actually had to sew it together a couple of times (and unpick) before I got it to line up nicely. Once you've done it a few times, it' easy to line up with out too much effort.
At the top and bottom you have a little angle overhang (I made all my tops and bottoms white because I am doing a white border all around my quilt). Cut if off and you've got your done it! Your first row of herringbone!
NOTE: This is a quilt I am in the process making for my son. To see the finished quilt top go here
For more tutorials check these out


No comments:
Post a Comment