

Here is what you will need
-13 fat quarters. OR 25 squares cut 10 1/2 inches by 10 1/2 inches
-You will also need 36- 2 1/2 by 2 1/2 inch squares from your fat quarters
-1 1/3 yard white fabric cut into 60- 2 1/2 inches x 10 1/2 inch strips
-Enough batting (I like 100% cotton) and backing for a 66 x 66 inch quilt
-Basting spray (or lots of safety pins)
-Walking foot (you can try and use your regular sewing foot, but I wouldn't recommend it)

This is the spray I use. I guess it's called fabric adhesive, but I like to call it basting spray. I ordered this off amazon along with my walking foot (which was only $25) and I've been pleased with it so far.

Now you might notice on my quilt that I have a boarder. I wanted to make it a little bigger and use up scraps. I cut what I had into pieces that were 2 1/2 inches wide. The length varied from piece to piece. I didn't figure it all out, all my pieces are different lengths. This is optional if you want a little more size. Just make sure you have batting and backing for a 70x70 quilt if you add the extra inches.

Let's discuss the pros and cons of machine quilting your own projects.
PROS-
1. You save money
2. You can still achieve a nice quilted look
3. You have bragging rights, "Ya I quilted the whole thing myself"
4. It looks harder than it is
5. Did I mention that you save money?
CONS-
1. The only con is that you won't get the beautiful designs and intricate patterns.
My advice for machine quilting
1. Buy a walking foot! You don't want your bottom fabric moving through your machine faster than your top fabric.
2. Practice on a small project, a table runner, a baby quilt, some scraps, etc.
3. Don't worry if it's not PERFECT! Quilts are homemade and part of what makes them special is that they're one of a kind and unique. So your line isn't 100% straight, no one will notice and it only adds to the charm of the quilt.
4. Don't try anything too tricky with a walking foot. Straight line or straight zig zag lines. Let's not get crazy.
5. GO FOR IT! If you try it and you don't like it, at least you will have tried. Don't be scared to experiment with new techniques and different styles of quilting.


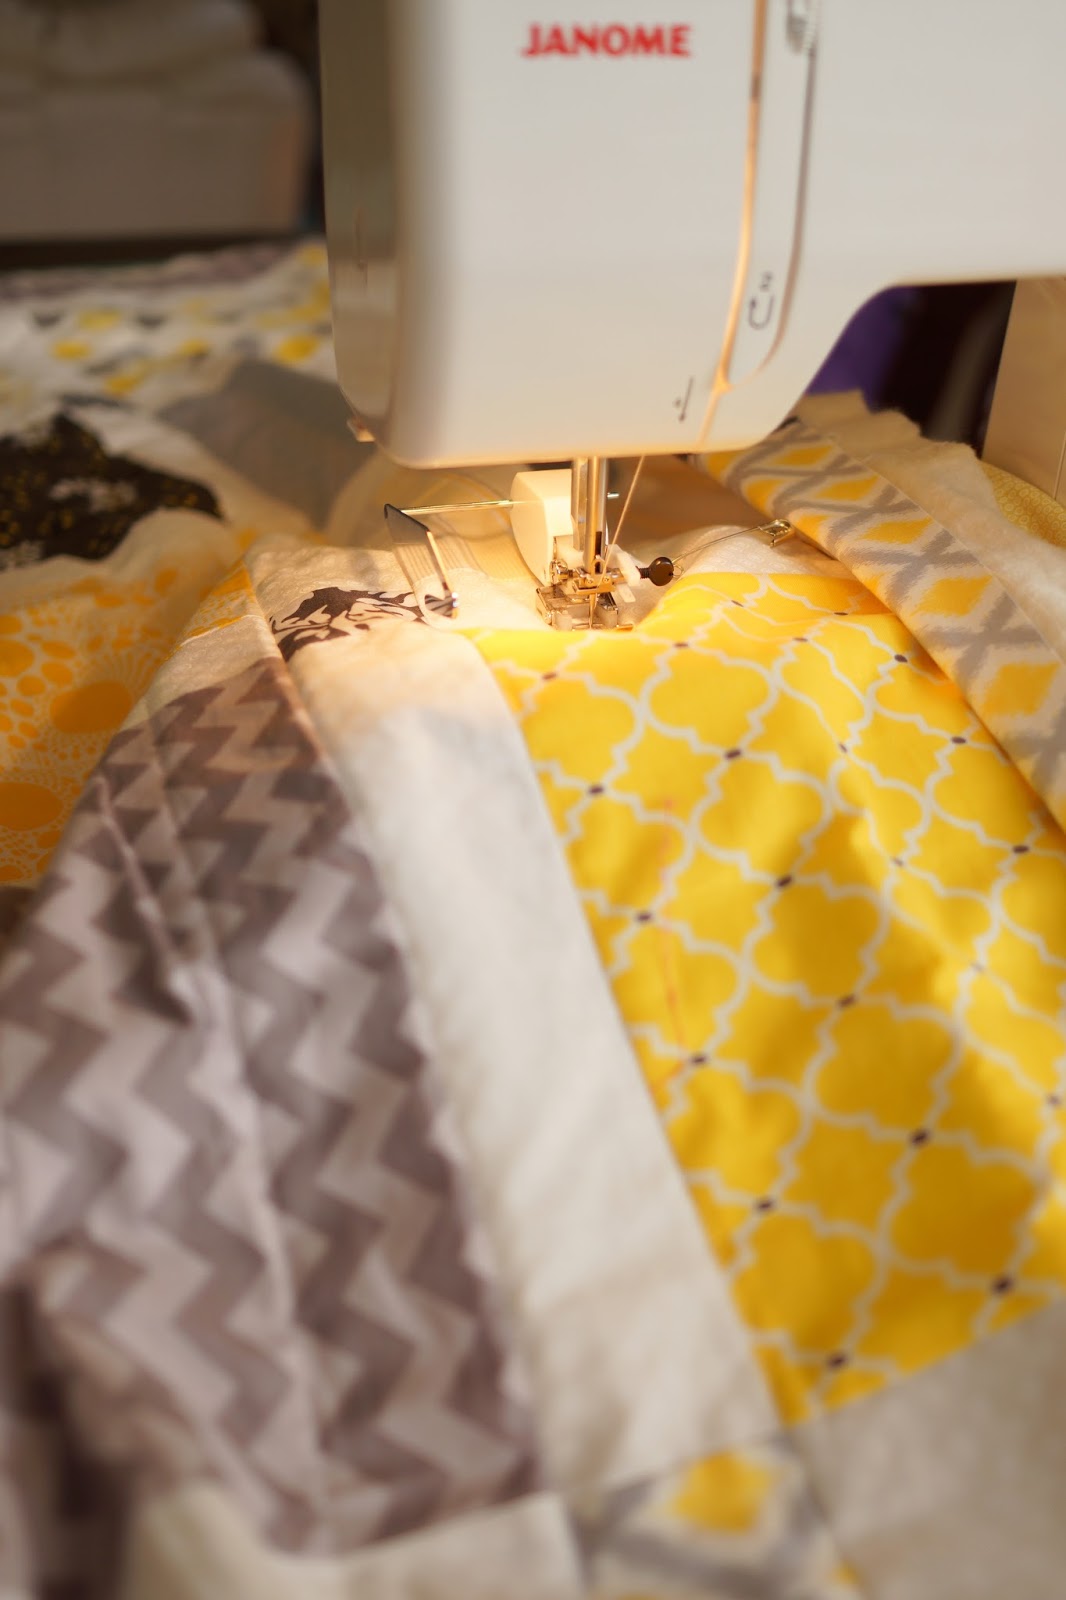
Alright, when I finally started quilting this baby I basted everything together with my spray and threw in the 4 safety pins I own for good measure. When you machine quilt you want to be sure that you're checking on what's happening with the fabric underneath. You want the fabric to be pretty taut so you don't have puckering. You'll also want to check your stitches every now and then. The worst is when you've done a few rows only to look at your bottom stitches and see that you needed to adjust the tension 20 minutes ago. No fun. Be aware of what your fabric is doing. The bigger the quilt, the more difficult this is. Difficult, but not impossible. I quilted this in 2 days, it maybe took me 3-4 hours total. I started in the middle (always start in the middle!!!!) on my white border. My lines were 2 inches apart. Which meant 4 lines through each square and stitching in the ditch on my borders. Your walking foot will come with a handy little measure tool (I had no idea what it was for the longest time since mine came with no instructions!). Be sure to check your lines often, as the tool (or quilting bar as it's known) can move around. Once you get the binding on and wash your quilt, it will look professionally made! It looked pretty good to me once I finished but once I washed it, it looked ever better! It got that nice crinkled, quilty look.
I'll let you in on a little secret, this quilt cost me about $75 to make!!!! I spent about $30 on fat quarters, $8 on the white fabric, $20 on the back, $12 on batting, and maybe about $5 for thread. Of course that doesn't include labor, but this is pretty quick to come together.


Have any of you ever made a quilt this size for less than $75?
Nice!
ReplyDeleteThanks, Christi!
ReplyDeleteOmg, you know, I never realized just how much I spend on fabric 😫 I almost always just use 90% of fabric I have already on hand and pick up a yard here or there as needed so I never actually stopped to calculate how much money actually goes into this little "hobby" of mine. I have a bad habit of goinng into Joann or (god forbid) the expensive quilt shops when payday rolls around and I want to pick up a couple of little things(but nothing in particular) and walk out, scratching my head asking myself what just happened? Maybe for my next project, I'll actually buy all new fabric just as an experiment. I live in the bay area, ca do stuff is already ridiculously expensive.
ReplyDelete